Blog
October 14, 2020

Often when we talk about Zend Server we point out the benefits of Long Term Support (LTS) and the robust features of the Application Server, including functions such as application performance management (APM), code tracing, monitoring, and many others.
While these features are significant, an often-missed advantage of Zend Server is the simplicity of installation and configuration, and it is that aspect that I would like to concentrate on in this blog.
Back to topZend Server EOL Is Coming
Zend Server 2019 reached EOL in July, 2025. Zend Server 2021 will reach EOL in December, 2027. The time to make your migration plan is now. Luckily, migrating to ZendPHP has never been easier. Use the resources below to explore your options.
A One Click Zend Server for IBM i Installation
Are you aware that, in a single step, you can go from an environment without PHP to being able to run PHP scripts? Let me take you through the step as well as demonstrate just how simple this is.
Back to topGetting Started
Current versions of Zend Server are installed as a Licensed Program on IBM i so, the method to install is as follows:
RSTLICPGM LICPGM(7PHPZND) DEV(*SAVF) SAVF(qgpl/zendphp7)If you are an IBM i person you readily understand the above command. But, in the interest of completeness, here's a breakdown of the command:
- RSTLICPGM - The actual command which will ReSTore a LICensed ProGraM.
- LICPGM(7PHPZND) - Provides the identifier (7PHPZND) for the LICensed ProGraM being installed (restored)
- DEV(*SAVF) - Indicates that the source of the installation files are contained in a SAVe File.
- SAVF(qgpl/zendphp7) - The location of the save-file that you would have previously uploaded to the system (ok, you caught me, I guess there's actually two steps. ;-)
So, what happens under the covers when the RSTLICPGM command is run?
First, a number of files are restored followed by a welcome screen that indicates what the rest of the process is going to do:
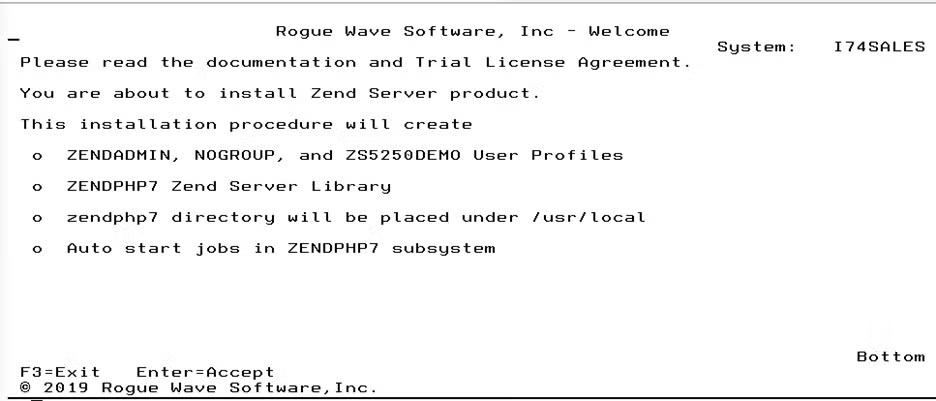
As you can see, a number of user profiles will be created along with a Library, subsystem, and directory structure (more on the directories in a moment). The only user interaction at this point is to press <ENTER> to accept the actions about to be taken.
The next thing that occurs is a a license agreement is displayed:
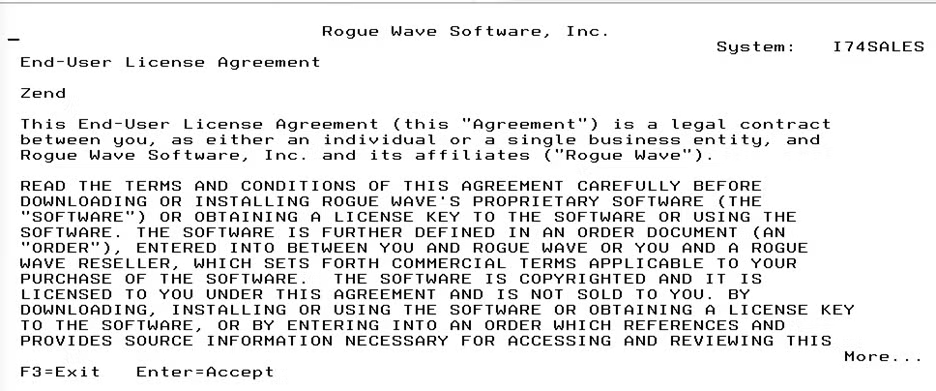
After reviewing the license agreement the <ENTER> key is used to accept it.
Now the installer really takes over and installs all of the files and performs all of the other actions indicated on the welcome page. When the installation is completed a final screen is displayed indicating that the installation is complete:

Press <ENTER> one last time and Zend Server is started and you're able to start executing PHP code. So, in summary, what did we do? We ran a single command and pressed the <ENTER> key a total of three (3) times. It doesn't get much easier than that!
Back to topChecking the Install
Want to prove the point that we have a fully functional PHP? Let's create a PHP script in the document root that was automatically configured for us (/www/zendphp7/htdocs).
<?php
	echo "Hello world – Zend Server is sure easy to install!!";
Call the script 'hello.php' (I'm just clever like that)
Now, point a web browser to the virtual host that was configured by Zend Server in the configuration file for Apache (10080) that is running in the subsystem that was created by the installer:
http://<IBMi>:10080/hello.phpWant to see what gets output in the browser, you guessed it:
Hello World - Zend Server is sure easy to install!!So at this point, we have shown that not only is PHP installed and functional, but an instance of the Apache web server was also configured to be PHP versant all without any user interaction!
Back to topWorking With Db2
By the way, if you are thinking that there is more work to be done to get access to Db2, nope! Consider the following script, again in the document root location:
<?php
   $conn = db2_connect('*LOCAL', '', '');
   $result = db2_exec($conn, "SELECT * FROM zendphp7.sp_cust");
   $firstRow = db2_fetch_assoc($result);
   echo "<pre>" . print_r($firstRow, true) . "</pre>";
If we call the script 'dbtest.php' it can be executed with the following URL:
http://<IBMI>:10080/dbtest.phpAnd the following will be output:
Array
(
    [CUST_ID] => 1221
    [COMPANY] => Kauai Dive Shoppe
    [FIRSTNAME] => LINA
    [LASTNAME] => Norman
    [CIVIL] => 2
    [ADDRESS] => 4-976 Sugarloaf Hwy
    [ADDR2] => Suite 103
    [CITY] => Kapaa Kauai
    [STATE] => HI
    [ZIP] => 94766-1234
    [COUNTRY] => US
    [PHONE] => 808-555-0269
    [FAX] => 808-555-0278
)
Final Test With XMLService
And for the final conclusive evidence that everything needed was installed, let's create a simple script that uses XMLService to execute a CL command:
<?php
require_once zend_deployment_library_path('PHP Toolkit for IBMI i') .
     '/ToolkitService.php';

$obj = ToolkitService::getInstance();

$rows = $obj->CLInteractiveCommand('DSPLIBL');
echo '<pre>' . print_r($rows, true) . '</pre>';
$obj->disconnect();
If we called the script iletest.php it can be executed via the following URL:
http://<IBMi>:10080/iletest.phpAnd the output from execution of the DSPLIBL command will be shown:
Array
(
    [0] =>  5770SS1 V7R4M0  190621            Library List
    [1] =>                           ASP
    [2] =>    Library     Type       Device      Text Description
    [3] =>    QSYS        SYS                    System Library
    [4] =>    QSYS2       SYS                    System Library for CPI's
    [5] =>    QHLPSYS     SYS
    [6] =>    QUSRSYS     SYS                    System Library for Users
    [7] =>    QGPL        USR                    General Purpose Library
    [8] =>    QTEMP       USR
    [9] =>                           * * * * *  E N D  O F  L I S T I N G  * * * * *
)
Pretty SLIC, right? (My IBM i friends will get that one.)
We have shown that with a single install we get a fully functional PHP complete with the driver for accessing Db2 data as well as the toolkit for leveraging XMLService to be able to integration with items such as CL commands, RPG programs, and more.
Back to topFinal Thoughts
One quick comment on the demo scripts in this blog – they obviously don't follow good coding practice as they should, at a minimum, have error checking throughout. The point of these scripts was simply to demonstrate that the functionality of PHP, Db2 access, and ILE integration are all there simply by installing Zend Server.
In conclusion, PHP is not hard, integrating PHP with IBM is not hard, and just as importantly, getting PHP on the platform doesn't need to be hard either. Hopefully, this blog opened your eyes to the ease of getting PHP on the IBM i platform and the possibilities it presents.
Migrate from Zend Server to ZendPHP Using the Ansible Playbook
With the help of the Zend Server to ZendPHP Ansible Playbook, migration has never been easier. Follow a few simple steps to quickly provision ZendPHP and deploy applications using existing Zend Server deployment packages at scale on IBM i systems.
Additional Resources
This webinar looks at how users can understand and manage the PHP environment on IBM i
Looking for additional information on Zend Server or IBM i? Be sure to spend some time with these resources.
- Blog - Picking the Right PHP for IBM i
- Blog - Migrating Zend Server to ZendPHP on IBM i
- Resource Collection - Guide to PHP and IBM i