Blog
April 2, 2024

ZendHQ is now available for IBM i, which gives IBM i shops the ability to easily observe, monitor, inspect, and debug applications using ZendPHP on IBM i.
In this blog, I'll give an overview of ZendHQ for IBM i, the benefits it offers, and then walk through how to install and configure ZendHQ on IBM i applications.
Back to topAbout ZendHQ for IBM i
ZendHQ is the PHP tool for application development and production. As a developer tool, it is designed to help identify issues quickly reducing the time spent debugging and trying to recreate problems. In the production environment it keeps an eye on PHP activity capturing valuable diagnostic information while also providing a built-in job queue for scheduling and dynamically starting PHP jobs. But that’s only scratching the surface. An important note before we start, Since ZendHQ interacts VERY closely with the PHP internals it may conflict with XDebug. Do not load both extensions together as they will clash with each other.
Back to topMake Your Zend Server Migration Plan
Zend Server EOL arrives in 2027. Luckily, migrating to ZendPHP + ZendHQ has never been easier. Learn more about your options, how migrating now will benefit your system, and methods for future-proofing your stack.
Top 3 Benefits of ZendHQ for IBM i Apps
ZendHQ has a number of features and benefits that will get IBM i teams excited, but there are three that are especially impactful, including monitoring, Z-Ray, and JobQueue (all of which our Zend Server users might find familiar).
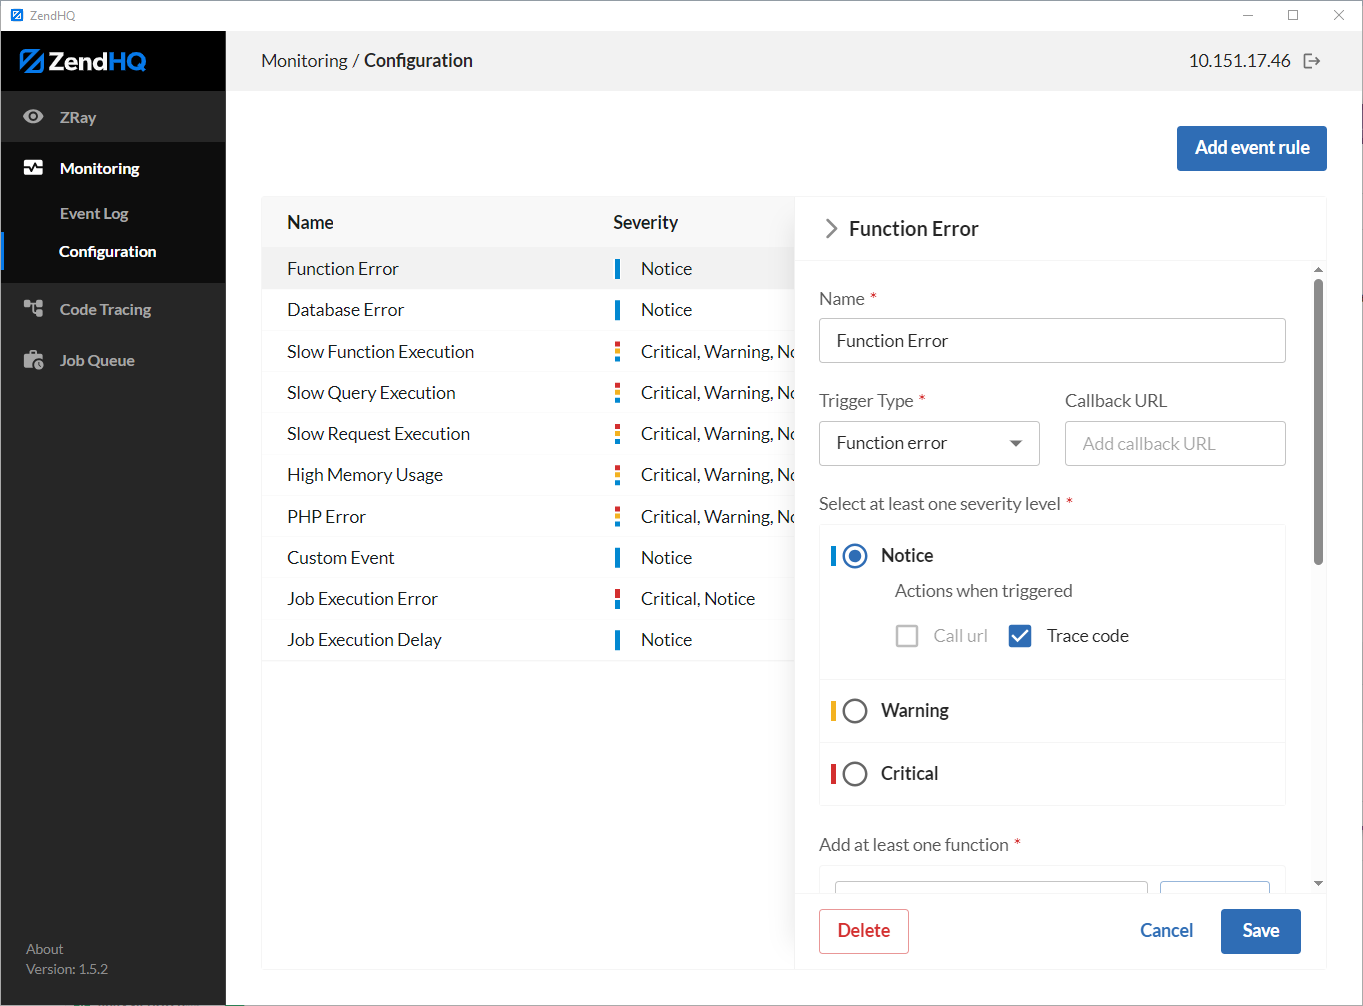
1. Monitoring
As a developer I’ve been asked many time “Why did this happen?” In many cases after a quick scan of the code I can usually answer that question quickly. But sometimes it just isn’t clear, or I cannot reproduce the problem on the dev machine (it works on my box). This is where the monitor in ZendHQ coupled with code tracing can act like a flight recorder of significant issues. With rules that you can fine tune to suite your own needs, the diagnostic step becomes easier. Different things may worry different teams. Sometimes it is performance, other times it is database requests or memory consumption.
Regardless of the issue, ZendHQ’s rules make it very flexible to implement the appropriate policy for managing your production PHP servers. The feature is also a handy development tool that can shine a light on coding issues that can be addressed immediately.
The callback feature built into ZendHQ means that you can enable virtually any behavior once the issue is triggered.
Maybe an email notification or text message? Possibly sending a packet to a Nagios trap? It’s completely up to you. In addition, there’s the “Code Tracing” feature that can show the breadcrumbs leading up to an issue designed to emulate a flight data recorder for your PHP applications.
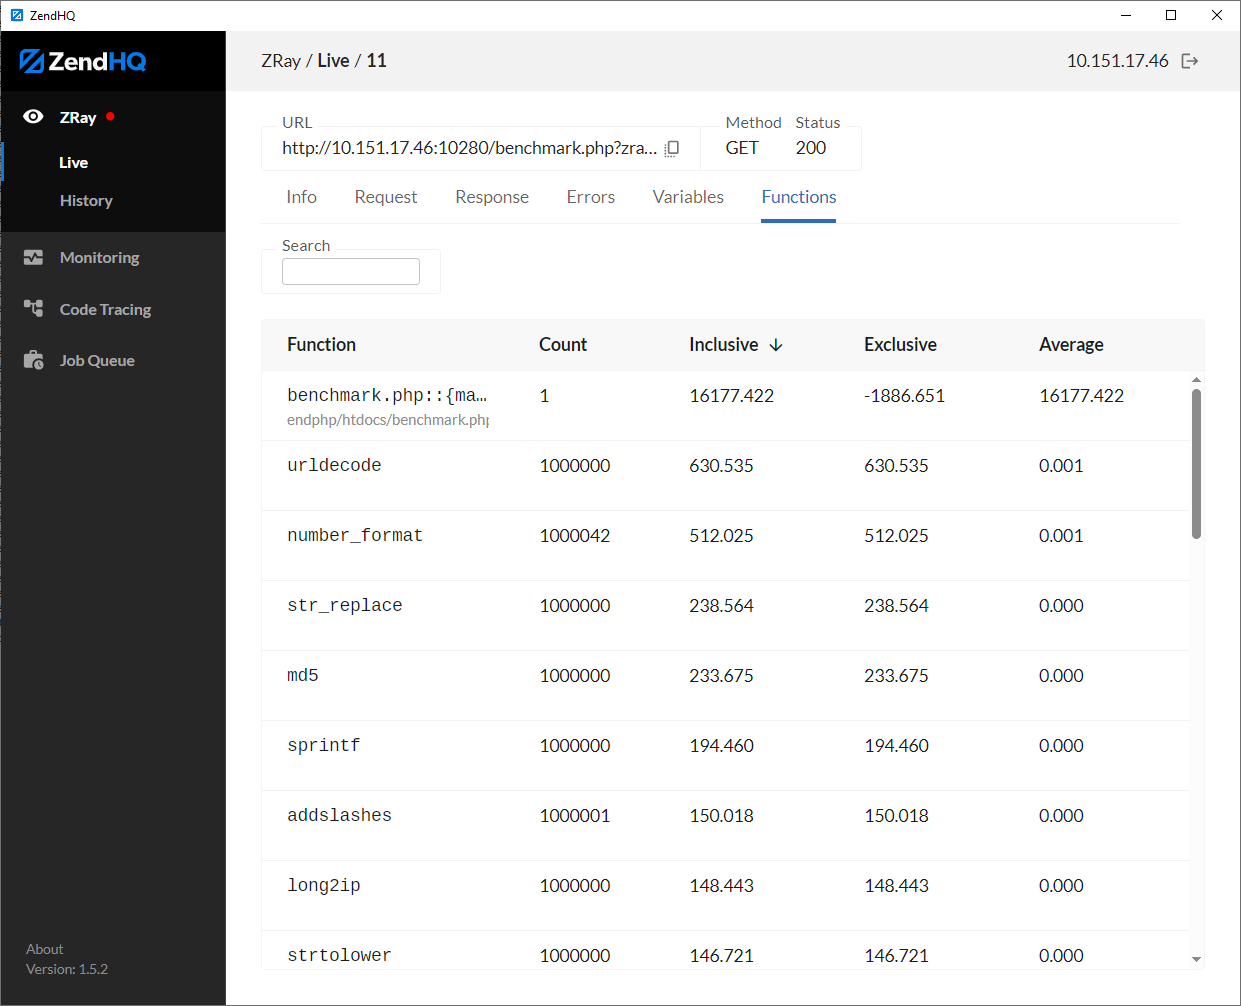
2. Z-Ray
When developing applications for IBM i we tend to write complex business logic. In many cases this represents a company’s competitive advantage and uniqueness. While a lot of business logic may be written in RPG I see plenty in PHP, too. So being able to watch the transactions as the server is processing becomes a VERY valuable tool. This is where Z-Ray comes in handy. With the ability to instantly see performance metrics, requests response information and variable content, Z-Ray provides an unparalleled level of detail at development time and in production when you need it. Analyzing page requests by inserting echo and time statements is painful. Z-Ray delivers that out of the box. These are the tools necessary to narrow down the focus and lead the developer by the hand to the issue. How much is that worth? What would it be worth to get back 1 or 2 hours a week times how many developers times how many weeks. In many cases it’s the little stuff that can really impact a cost model or deadline. Maybe a tool like Z-Ray that helps you get to the resolution faster might help?
3. JobQueue
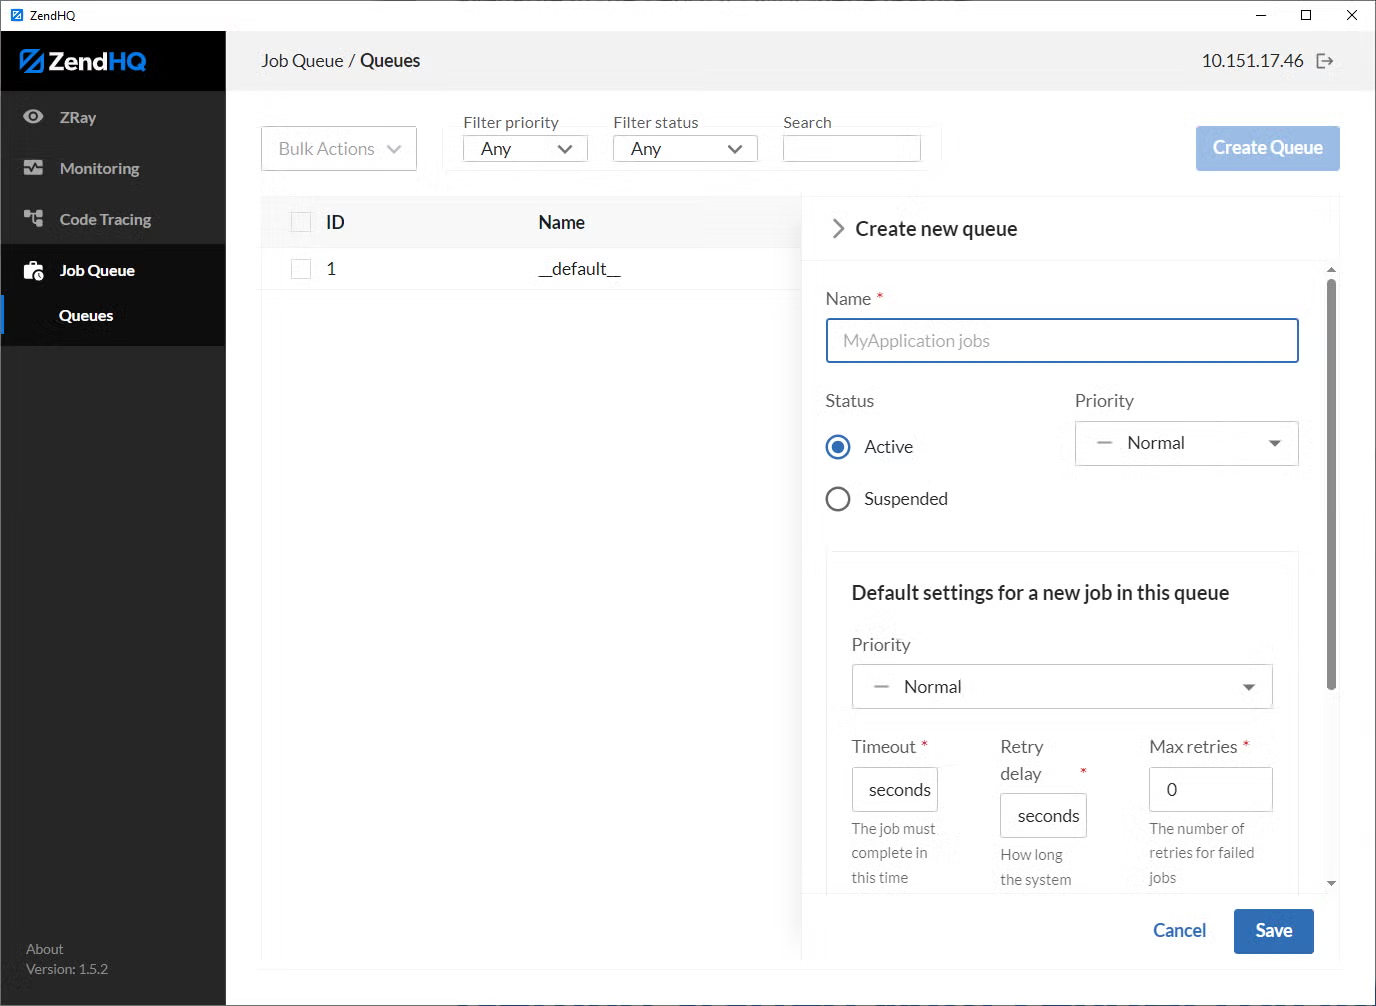
Sometimes you just need to run something asynchronously. Maybe in another process or just at another time. The JobQueue feature has a bifurcated model that supports schedule and on demand requests. Sometimes you have a process that just won’t perform well and you need to provide the illusion of sub second response time. With the JobQueue the site can be actively serving pages and long running processes can be spawned asynchronously, just like a job getting submitted to batch via CL call. In addition to on demand workload, job can be scheduled based upon your needs. Maybe you need to email a report at 5:00 every day, or after the batch work has been completed for the day.
Scheduling a job is as easy as clicking the create button, adding a URL, setting a time and clicking save. But the job queue doesn’t end there as you also have features like a priority setting which can push some requests like a credit card authorization ahead of a batch report. Do you want the job info to hang around so you can review it or just let the system purge it off? Or maybe you just need to suspend the job so that it stops running for a time while something is worked out and then resume it at a later date. All these features are available in the ZendHQ JobQueue feature.
 Back to top
Getting Started With ZendHQ on IBM i
This is where things get exciting. You probably already have most of what you need to get started with ZendHQ, namely ZendPHP. Each ZendPHP instance represents a PHP stack entry that can be accessed through a single GUI of ZendHQ. Navigating between these is as easy as selecting a new server.
Don’t worry if you only have one instance, you can manage that just fine, too. But as many more developers are doing local development and then promoting code to QA then Prod, each instance of ZendPHP can be monitored and accessed from the same desktop UI. The whole thing starts with three primary installation steps:
- Installing the ZendHQ Extension
- Installing the ZendHQ Subsystem
- Installing the ZendHQ GUI
Installing ZendHQ Step 1: The ZendHQ Extension
The PHP stack needs an extension to enable communication with the ZendHQ subsystem and client. So hopefully you’ve already installed ZendPHP (not Zend Server) on your IBM i. If not, please refer to these directions.
Also, hopefully you have the repository added to your Open Source Package Management(OSPM) in ACS via the ZendPHPCTL script which is illustrated here. You should see an option available for installation for your PHP version illustrated in this image.
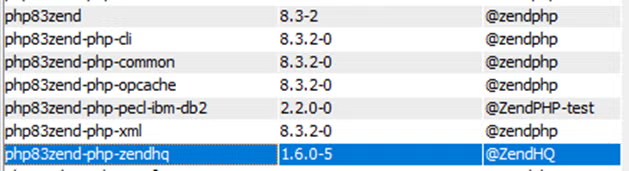
Just go ahead and click install and the extension will be ready to start. But don’t forget to restart the PHP stack as changes to the PHP stack don’t take effect until the PHP stack is restarted which can be done easily with the CL command:
STRTCPSVR SERVER(*HTTP) RESTART(*HTTP) HTTPSVR(ZENDPHP) or from the green screen that we’ll talk about in a bit.
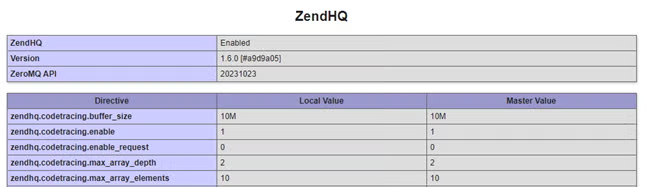
A quick look at phpinfo should reveal the status of the ZendHQ extension as enabled.
Installing ZendHQ Step 2: The ZendHQ Subsystem
In order to have a way to collect data without interrupting the PHP stack we need a subsystem job that provides access to the data collected vi the extension. This subsystem is installed through another option on the OSPM screen in ACS. Look for this little guy and click install.

Once these are installed you should see a library on the IBM i called ZENDPHP that contains not only the ZendHQ daemon, but also a handy Green Screen menu for managing the PHP stack on your IBM i.

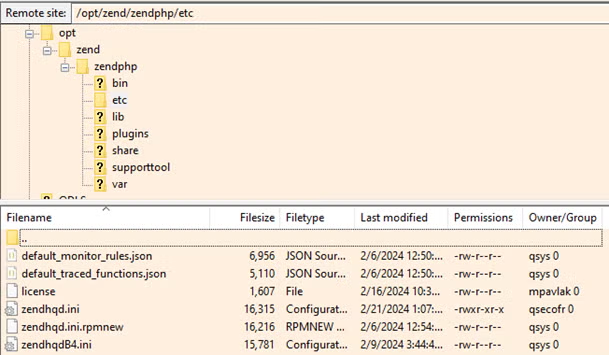
You should have received a “license” file from Zend when you purchased support, or maybe you have a trial license that you can obtain from here. That license file should be copied to a directory on the IBM i under the root /opt/zendphp/etc directory.
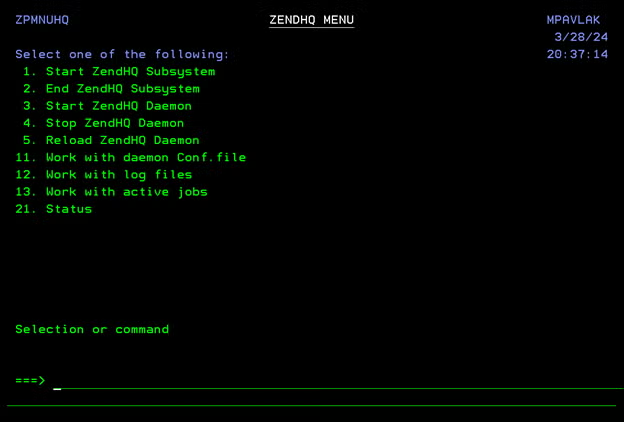
The ZendHQ Daemon may start automatically. But, if not, call the menu at GO ZENDPHP/ZPMENU and select option 2 to navigate to the menu for ZendHQ and take option 1 & 3.
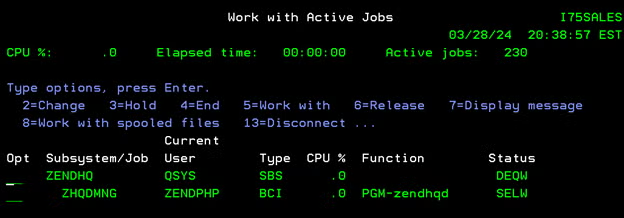
When running, you should see the subsystem and Daemon humming merrily along.
Installing ZendHQ Step 3: The ZendHQ Client
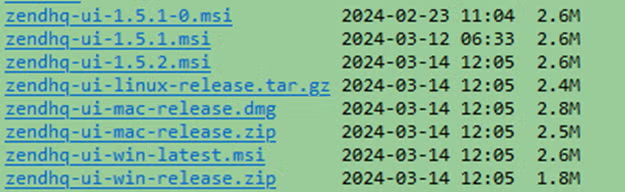
The ZendHQ client provides the GUI interface to ZendHQ so that you can access the features. You can download the installer here. Select the version you want based upon your platform, Linux Windows or Mac:
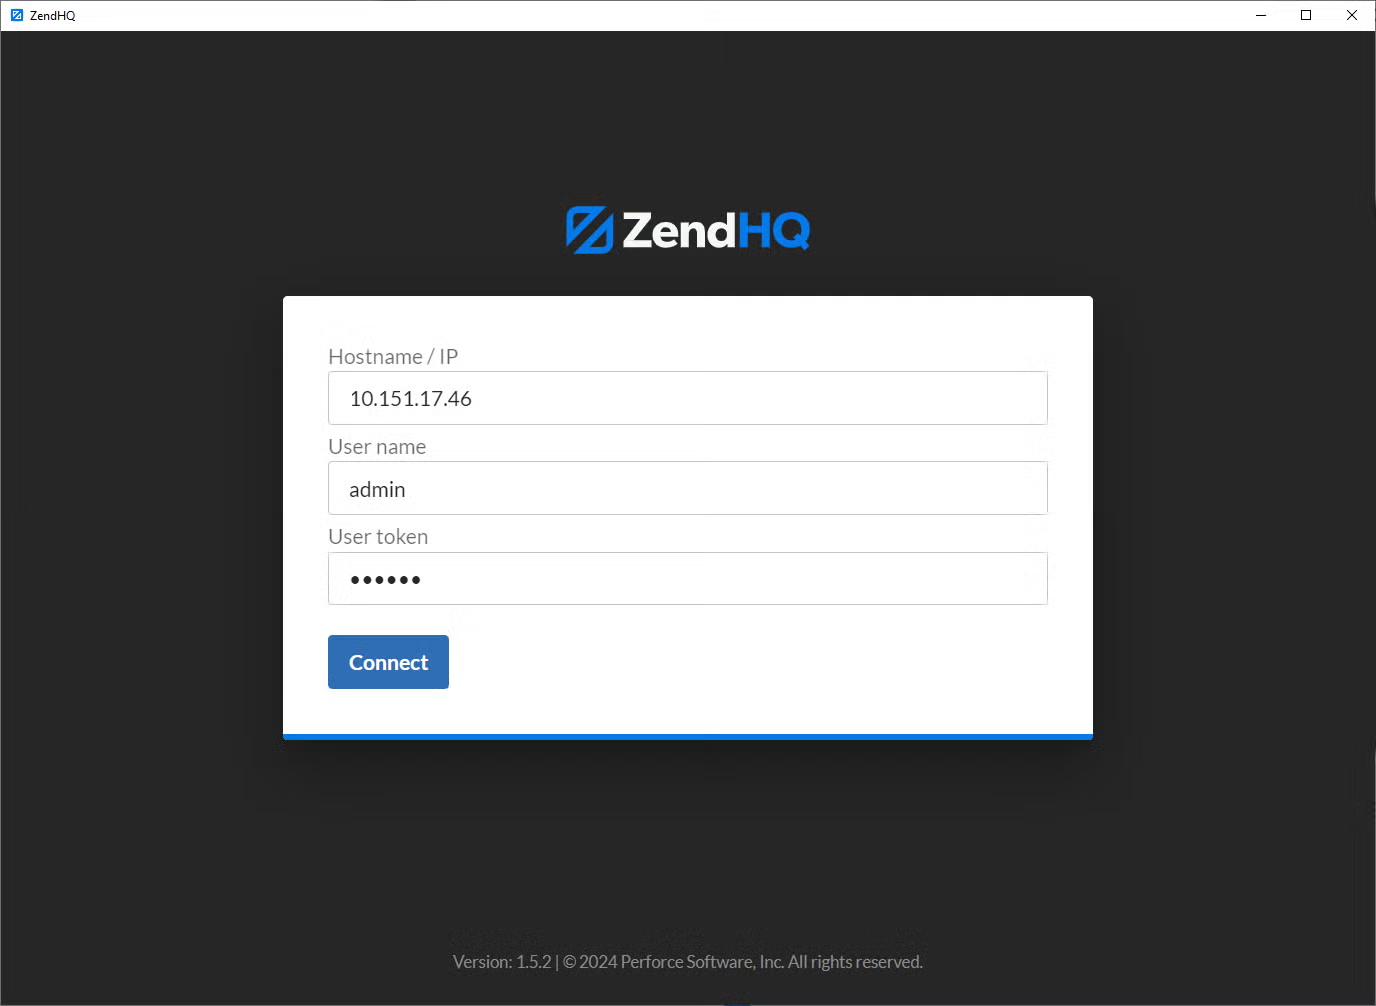
Once installed, you can launch the application and add the IP or DNS of the IBM I partition you want to connect with, a user and password. The default user of admin and password of zendphp can work out of the gate and you can add users and change passwords when ready. In an upcoming version we’ll have LDAP user support.
Press connect and you should be greeted with the main screen:
Now you can access ZendHQ and all of its features like a pro! To learn more about ZendHQ and its features, please check out our documentation.
Back to topFinal Thoughts
I hope this quick intro into the world of ZendHQ helped to ease the installation process. As always, customers under support can open a ticket with our support desk for assistance troubleshooting installation issues. If you're not a customer yet, and you want to see how ZendHQ might work for your environment, we have both a free trial, and custom demo option available to you.
ZendHQ is a great way to improve the development and operational experience using PHP on IBM i and by taking advantage of this feature you’ll begin to see the value right away.
Ready to See ZendHQ in Action?
Schedule a demo, or start a free ZendPHP and ZendHQ trial via the links below.
Additional Resources
- Blog - Configuring ZendHQ and MariaDB for IBM i Disaster Recovery
- Blog - How to Use Db2 Services for PHP Apps on IBM i
- Blog - Comparing ODBC vs. Db2 for IBM i
- Blog - Exploring IBM i 7.5 for PHP Apps
- Blog - Modernizing IBM i On a Budget
- Blog - Zend Server to ZendPHP Deployment With Ansible for IBM i
- Demo - ZendHQ