Blog
November 9, 2023

Deploying PHP on AWS may seem daunting at first. While there are a veritable sea of images to choose from, sometimes it can be hard to track down documentation on how to actually install, configure, and deploy your application.
In this blog, we walk through two ways to deploy PHP on AWS, the first via a ZendPHP image, and the second via a Zend Server image. We also discuss some of the basic concepts and ideas you need to have a handle on before you get started. Let's jump in!
Back to topCan I Run PHP on AWS?
Back to topYes, you can deploy PHP on AWS. Use this guide to install, configure, and deploy PHP on AWS.
PHP on AWS: Deployment Terms to Know
Before we jump into how to deploy PHP on AWS, let’s start with a simple vocabulary of common terms that are used when discussing PHP on AWS:
- AWS (Amazon Web Services)
- EC2 (Elastic Compute Cloud): an AWS service that provides computing resources
- AMI (Amazon Machine Image): a filesystem image with some metadata like type of OS in image and type of virtualization to use when starting new server
- Instance: a Virtual Machine running on EC2 using some AMI
- Instance type: a combination of CPU, memory, storage, and networking capacity
- RDS (Relational Database Service): an AWS service that provides many relational databases (supports, but not limited to, MySQL)
To help you understand the different AWS security settings, these security terms will become handy:
- VPC (Virtual Private Networking): allows you to define one or more networks which is composed of one or more VPC Subnets
- VPC Subnet: similar to regular network subnet
- Security Group: a set of network rules. Resources on AWS can belong to one or more Security Groups.
- Key pair: regular SSH key pair. Must be specified when starting EC2 Instance to allow SSH access.
AWS PHP Images
The AWS Marketplace has a myriad of full blown application servers with different PHP versions and SAPIs available out of the box; including community PHP, Zend Server, and ZendPHP; on many different operating systems. This makes it quick and simple to spin up an image and drop your PHP application in, and deploy PHP on AWS.
ZendPHP Images
Among the many different application servers available through AWS Marketplace are the images we provide for ZendPHP. We provide images for configurations with Nginx or Apache on Ubuntu, RHEL, Amazon Linux, Debian, and more. There are options to have the license built into the image as well as bring your own license (BYOL).
Back to topPHP on AWS: Deploying a ZendPHP-Based Application on AWS
Deploying a ZendPHP-Based AMI follows the same process as any other AMI with the nuance of using zendphpctl to install and configure PHP.
Step 1: Launching ZendPHP on AWS
There are two ways to launch PHP on AWS using ZendPHP. First is to use AWS Marketplace website (option A) and launch ZendPHP from there. Second is to use Marketplace inside AWS Console (option B). We will cover both ways here.
Option A: Launch ZendPHP Using AWS Marketplace Website
- Open AWS Marketplace website
- Sign in or create AWS account by clicking relevant link on top of page
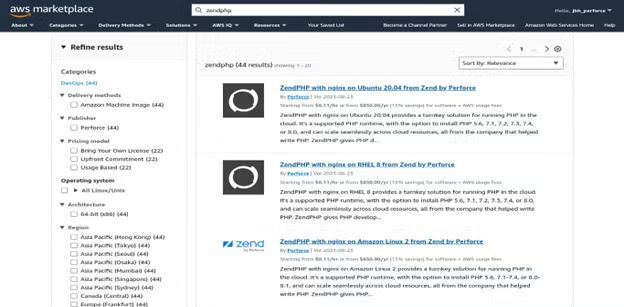
- Type ‘ZendPHP’ in the search bar and press Enter
- In the search result locate ZendPHP with relevant PHP version, edition, and operating system. For this guide please select 'ZendPHP with nginx on Ubuntu 2.0.04'.
- On the product page click on "Continue" button located on the right
- Configure and customize the launch settings of ZendPHP instance.
- Version: version of ZendPHP AMI to use. It’s recommended to always use latest version
- Region: which region ZendPHP instance should be started
- Instance type: how much CPU/memory/Storage you want for your instance
- VPC settings: which VPC and subnet instance is started
- Security group: security group for instance, you can select existing security group or let AWS create new security group with default rules for ZendPHP (recommended)
- Key pair: which SSH key pair should be installed on this instance
- Review the launch settings and click on "Accept Software Terms & Launch with 1-Click" button, After the first launch this button will be named "Launch with 1-Click".
- Login to AWS Console to see the new instance and get its details
Option B: Launch ZendPHP Using AWS Console
- Login to AWS Console
- Open EC2 Console
- On dashboard click on "Launch Instance"button
- Enter 'ZendPHP' in the AMI search bar
- Select relevant ZendPHP product with the proper edition and operating system and click Continue button in product summary that is shown. For this guide please select 'ZendPHP with nginx on Ubuntu 2.0.04'.
- Select instance type
- On steps 3, 4, 5 various instance settings can be configured.
- Either select an existing key pair (and acknowledge you have access to it) or create a new one and click "Launch Instances"
- Enter friendly name for your instance that will be used to identify it, review the settings, and click on "Launch instance" button
- Wait while the instance is created and then click on "View Instances" button at the bottom of a page Launch Status
Bootstrap ZendPHP
The ZendPHP AMIs from AWS Marketplace come with zendphpctl preinstalled and ready to use with our repository preconfigured. Once the instance is up and running, SSH into the instance and use zendphpctl to finish setup:
zendphpctl php install 8.2
zendphpctl ext install –php 8.2 curl dom mysqli sodium openssl imagick xml zip
zendphpctl fpm install 8.2
zendphp-switch to 8.2
The above will install the PHP version of your choice, extensions needed for WordPress, add php-fpm for it, and ensure the vhost uses the correct php-fpm pool.
Note: The ZendPHP AMIs have access to any ZendPHP versions (licenses required for those out of community support), and you simply install the one you need with zendphpctl, as shown above.
Step 2: Follow the Rest of the Steps for Zend Server
In order to get an example application going, simply follow steps 2-3 for Zend Server below, where we cover creating an RDS and launching WordPress.
Back to topOn-Demand Webinar: Simplify Your Zend Server to ZendPHP Migration With the New ZendPHP Ansible Playbook
Join our expert for an on-demand discussion surrounding the new ZendPHP Ansible Playbook, and learn how it can simplify your migration from Zend Server to ZendPHP.
PHP on AWS: Deploying Zend Server on AWS
Step 1 - Launching Zend Server on AWS
There are two ways to launch Zend Server on AWS. First is to use AWS Marketplace website (option A) and launch Zend Server from there. Second is to use Marketplace inside AWS Console (option B). We will cover both ways here.
Option A: Launch Zend Server Using AWS Marketplace website
- Open AWS Marketplace website
- Sign in or create AWS account by clicking relevant link on top of page
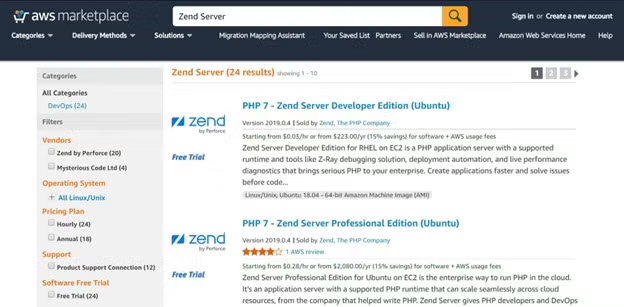
- Type ‘Zend Server’ in the search bar and press Enter
- In the search result locate Zend Server with relevant PHP version, edition, and operating system. For this guide please select 'PHP 7 - Zend Server (Ubuntu)'.
- On the product page click on "Continue" button located on the right
- Configure and customize the launch settings of Zend Server instance.
- Version: version of Zend Server AMI to use. It’s recommended to always use latest version
- Region: which region Zend Server instance should be started
- Instance type: how much CPU/memory/Storage you want for your instance
- VPC settings: which VPC and subnet instance is started
- Security group: security group for instance, you can select existing security group or let AWS create new security group with default rules for Zend Server (recommended)
- Key pair: which SSH key pair should be installed on this instance
- Review the launch settings and click on "Accept Software Terms & Launch with 1-Click" button, After the first launch this button will be named "Launch with 1-Click".
- Login to AWS Console to see the new instance and get its’ details
Option B: Launch Zend Server using AWS Console
- Login to AWS Console
- Open EC2 Console
- On dashboard click on "Launch Instance" button
- Enter 'Zend Server' in the AMI search bar
- Select relevant Zend Server product with relevant PHP version, edition, and operating system and click Continue button in product summary that is shown. For this guide please select For this guide please select 'PHP 7 - Zend Server (Ubuntu)'.
- Select instance type
- On steps 3, 4, 5 various instance settings can be configured.
- Either select an existing key pair (and acknowledge you have access to it) or create a new one and click "Launch Instances"
- Enter friendly name for your instance that will be used to identify it, review the settings, and click on "Launch instance" button
- Wait while the instance is created and then click on "View Instances" button at the bottom of a page Launch Status
Bootstrap Zend Server to Get Zend Server Ready for Work
Once you have finished either option A or B, you need to make Zend Server ready for work. We have to bootstrap it using very simple wizard. To do this we open the Zend Server UI which is accessible using a web browser on port 10081 of the instance we just started.
We need to find out either the public DNS (what we use in this guide) or public IP of the instance. We will also need the instance ID to enter Zend Server UI. By default Zend Server UI is protected so you have to enter instance ID as login and password, but once you bootstrap Zend Server and set admin password you won’t have to use it again.
Follow these steps to find “Public DNS” and “Instance ID” of your instance:
- Open AWS Console
- Enter EC2 Console
- In the menu on the left click on “Instances” link
- Locate your instance in the list of instances and click on it
- On the bottom pane you will see information about the instance shown in 2 columns
- “Public DNS” field is on top of right column
- “Instance ID” field is on top of left column
Now that we have public DNS name of instance we can open our browser and enter the following address to access Zend Server UI: http://<Public DNS>:10081/
Once you open Zend Server UI you will first be asked to authenticate. Enter “Instance ID” you found earlier as both login and password.
You will then be presented a wizard that will guide you to setup Zend Server in a few very simple steps. Upon finishing wizard and successfully bootstrapping your Zend Server is fully ready to work.
Note: bootstrap process can be fully automated by providing user data to instance.
Step 2 – Launching RDS for MySQL
We have Zend Server, which means that we have fully working and configured web server with PHP. To go on and launch WordPress, we are still need to add a MySQL database server. We, of course, could install and configure it on the same instance with Zend Server, but it’s much simpler to use AWS RDS. RDS provides many database services including MySQL. So let’s setup an RDS instance and configure Security Group to allow access to it:
- Open AWS Console
- Open RDS Console
- Click “Launch a DB Instance” button
- Select “MySQL” tab on the left and click “Select” button
- Select “MySQL” under Dev/Test section and click “Next Step” button
- Configure all options you see on screen (once you select some option, it’s description is presented on the right), for our example fill following details:
- DB Engine Version: Latest
- DB Instance Class: db.m3.medium
- Multi-AZ Deployment: No
- Storage Type: General Purpose (SSD)
- Allocated Storage: 5GB
- DB Instance Identifier: unique name for your DB Instance
- Master Username: root
- Master Password: your password>
- Confirm Password: must be same as Master Password
- Click “Next Step” button
- Advanced Settings step - as in previous step, clicking any option shows its description on the right. For this guide change only the following settings:
- VPC: select your default VPC
- Subnet Group: select any subnet group
- Publicly Accessible: yes
- Availability Zone: No preference
- VPC Security Group: select same Security Group as Security Group of EC2 instance you created (if you do not remember it, you can find it in EC2 console on details pane where you found “Instance ID” and “Public DNS” fields)
- Database Name: leave empty
- Backup Retention Period: if you do not want to backup this RDS, select 0
- Click “Launch DB Instance”
Now we have to wait till our new DB instance is launched and ready for use. While waiting we can configure our Security Group rules to allow communication between web server and MySQL DB server.
Configure Security Group
There are two options for configuration here: either allow communication only between web server and MySQL server (more suitable for production environments), or allow anyone to connect to MySQL DB server (more suitable for development environments). In this guide we will cover only second option.
Allow anyone to connect to MySQL server
- Open AWS Console
- Open EC2 Console
- Click on “Security Groups” link in the menu on the left
- Select relevant Security Group
- In the details pane on bottom click on tab “Inbound”
- Click on “Edit” button
- In the dialog shown click “Add Rule”
- Fll values of new rule as following:
- Type - Custom TCP Rule
- Protocol - TCP
- Port Range - 3306
- Source - Custom IP and enter 0.0.0.0/0 as IP
- Click “Save” button
To find MySQL server DNS see how to find endpoint (which is also MySQL DNS) in next step.
Step 3 - Deploy WordPress
Once RDS has finished starting (it can take 10 minutes or even more), you have to find its endpoint. For this follow these steps:
- Open AWS Console
- Open RDS Console
- Click on “Instances” link in the menu on the left
- Click on your RDS instance
- Locate “Endpoint” field and save it
Once we have MySQL endpoint we can deploy the WordPress application. For this do the following:
- Open Zend Server UI (reminder - http://<instance public DNS>:10081/)
- Login to Zend Server (if needed)
- Click on “Getting Started” menu on the left
- Click on WordPress icon located under “Deploy sample apps” section
- Wait till WordPress application is downloaded and click “Next” button
- Next you will be presented “README” section with details about WordPress package, you can read them and then press “Next”
- Here you can fill application details:
- Display name: name that this application will have in applications list
- Virtual Host: on which virtual host application should be deployed (leave “default server”)
- Path: path under which application will be deployed (leave empty)
- Click “Next” to proceed
- Read EULA, check checkbox under it and click “Next”
- On next screen you will see prerequisites validation status
- Click “Next” to continue
- Now the important part - user parameters, fill them as following:
- Site URL: must be http://<Instance Public DNS>/
- Blog Name: fill as you like
- Database host: must be set to endpoint of RDS instance
- Database username: root
- Database password: password you entered when you created RDS instance
- Database name: name of database for WordPress (change only if needed)
- WordPress admin username: username for admin user of WordPress
- WordPress admin password: password for admin user of WordPress
- WordPress admin email: email for admin user of WordPress
- Table prefix: prefix for tables created in database (change only if needed)
- Click “Next” button
- Review deployment summary and click “Deploy”
Once you click “Deploy,” PHP on AWS deployment will be started. It should take up to a few minutes to finish (but most of time it finishes in tens of seconds). Once the application status on applications list page changes to “Deployed”, you can access WordPress on http://<Instance Public IP>/
Back to topFinal Thoughts
In this blog we looked at two ways to deploy PHP on AWS. The first using ZendPHP, and the second using Zend Server. However, there are many other Zend PHP AWS images that we didn't walk through. With image options that include Nginx or Apache on Ubuntu, RHEL, Amazon Linux, Debian, and more, our goal is to make it as easy as possible for teams to deploy PHP applications in the cloud, on premises, or in hybrid environments.
PHP on AWS Deployment Made Easy With Zend AWS Images
Ready to get started deploying your own PHP application on AWS? Explore the Zend AWS listings via the link below.
Additional Resources
- Certification - Zend PHP Certified Engineer Exam
- 101 Guide - Developing Web Applications with PHP
- Blog - PHP Development: Using PHP Extensions
- Technical Guide - Writing PHP Extensions
- Blog - PHP Encryption with Libsodium
- Blog - 2024 PHP Deployment and Development Trends
- Blog - How to Migrate Zend Server to ZendPHP